作为Python开发者,你是否遇到过这样的困扰:项目文件越来越多,模块导入变得混乱,不知道如何合理组织代码结构?或者看到别人项目中那些神秘的__init__.py文件,却不知道它们的真正作用?
本文将深入解析Python包的概念和__init__.py文件的核心机制,帮你构建更加专业和可维护的项目架构。通过实战案例,你将学会如何利用包管理让代码组织井然有序,提升Python开发效率。
🔍 什么是Python包?模块与包的本质区别
📁 模块 vs 包:一个文件 vs 一个文件夹
在Python编程中,很多开发者容易混淆模块和包的概念:
模块(Module):
- 本质上就是一个
.py文件 - 包含Python代码、函数、类等
- 可以被其他程序导入使用
包(Package):
- 是一个包含多个模块的文件夹
- 必须包含
__init__.py文件(Python 3.3+可选,但强烈推荐) - 可以包含子包,形成层次结构
作为Python开发者,你是否经常遇到这样的困扰:相同的功能代码在不同项目中反复编写,项目结构越来越臃肿,代码复用率极低?或者在团队协作中,无法高效地共享和维护通用功能模块?
本文将深入探讨Python自定义模块的创建与管理,通过实战案例教你构建高质量的可复用代码库。无论你是Python初学者还是有经验的开发者,掌握自定义模块创建都是提升开发效率和代码质量的关键技能。我们将从问题分析入手,提供完整的解决方案,并通过具体的代码实战帮你真正掌握这项技术。
🎯 问题分析:为什么需要自定义模块?
代码重复的痛点
在日常的Python开发中,我们经常面临以下问题:
项目间代码重复:数据库连接、文件处理、日志记录等通用功能在每个项目中都要重新编写。
维护成本高:相同功能的bug需要在多个地方修复,版本更新困难。
团队协作效率低:缺乏统一的工具库,每个开发者都在"重复造轮子"。
模块化开发的优势
通过创建自定义模块,我们可以获得以下好处:
- 代码复用:一次编写,多处使用
- 模块化管理:功能清晰分离,易于维护
- 团队协作:统一的代码标准和工具库
- 版本控制:独立的模块版本管理
在Python开发中,你是否遇到过这样的困扰:项目越来越大,代码文件越来越多,不知道如何优雅地组织和复用代码?或者在导入模块时总是出现ModuleNotFoundError错误,不知道该如何解决?
作为一名Windows下的Python开发者,掌握模块导入与使用技巧是构建大型应用程序的基础。本文将从实战角度出发,深入浅出地讲解Python模块系统的核心概念,帮你解决模块导入的常见问题,让你的代码更加模块化、可维护。无论你是初学者还是有一定经验的开发者,这篇文章都将为你的Python编程技巧带来质的提升。
🔍 问题分析:为什么要使用模块?
代码复用性差的痛点
在实际开发中,我们经常遇到以下问题:
- 代码重复:相同的函数在多个文件中重复定义
- 文件过大:单个.py文件包含过多功能,难以维护
- 命名冲突:不同功能的函数使用相同名称
- 团队协作困难:多人开发时代码组织混乱
模块化开发的优势
Python的模块系统完美解决了这些问题:
- 代码复用:一次编写,多处使用
- 命名空间隔离:避免命名冲突
- 逻辑分离:不同功能模块独立开发和测试
- 提升可维护性:代码结构清晰,便于后期维护
💡 解决方案:Python模块系统详解
🏗️ 模块的基本概念
在Python中,**模块(Module)**就是一个包含Python代码的.py文件。每个模块都是一个独立的命名空间,可以定义函数、类和变量。
📦 包(Package)的概念
**包(Package)**是包含多个模块的文件夹,必须包含__init__.py文件(Python 3.3+中可选)。包提供了更高层次的代码组织方式。
Pythonmyproject/
    ├── __init__.py
    ├── utils/
    │   ├── __init__.py
    │   ├── file_helper.py
    │   └── data_processor.py
    └── core/
        ├── __init__.py
        └── main_logic.py
🔧 代码实战:模块导入的各种方式
🌟 基础导入方式
import 语句
Python# 导入整个模块
import os
import sys
import datetime
# 使用模块中的功能
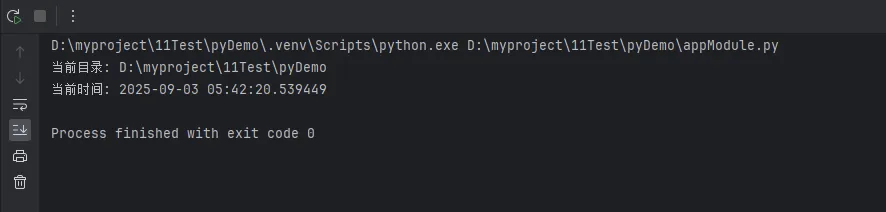
current_path = os.getcwd()
current_time = datetime.datetime.now()
print(f"当前目录: {current_path}")
print(f"当前时间: {current_time}")
在当今数字化工厂的浪潮中,传统的生产线管理正面临着数据孤岛、反应滞后、优化困难等痛点。想象一下,如果你的生产线能像有经验的工程师一样,24小时不间断地监控设备状态,智能分析异常,并主动提出优化建议,那将是多么令人兴奋的场景!
今天,我将带你用Semantic Kernel这个微软最新的AI编排框架,从零开始构建一个生产线智能优化系统。不仅仅是理论讲解,更有完整的代码实战,让你真正掌握AI Agent在工业场景中的应用精髓。
无论你是想了解最新AI技术的C#开发者,还是希望将AI应用到实际业务场景的技术管理者,这篇文章都将为你打开一扇新的技术大门。
🎯 痛点分析:传统生产线管理的三大困境
📊 数据处理困境
现代生产线每秒产生海量数据:温度、压力、转速、缺陷率等,传统系统往往只能做到事后分析,错过了最佳优化时机。
🔍 异常识别滞后
依靠人工巡检和简单阈值报警,往往是问题已经发生才被发现,缺乏预测性维护能力。
💡 优化经验无法沉淀
资深工程师的经验难以系统化,新员工学习周期长,企业知识资产容易流失。
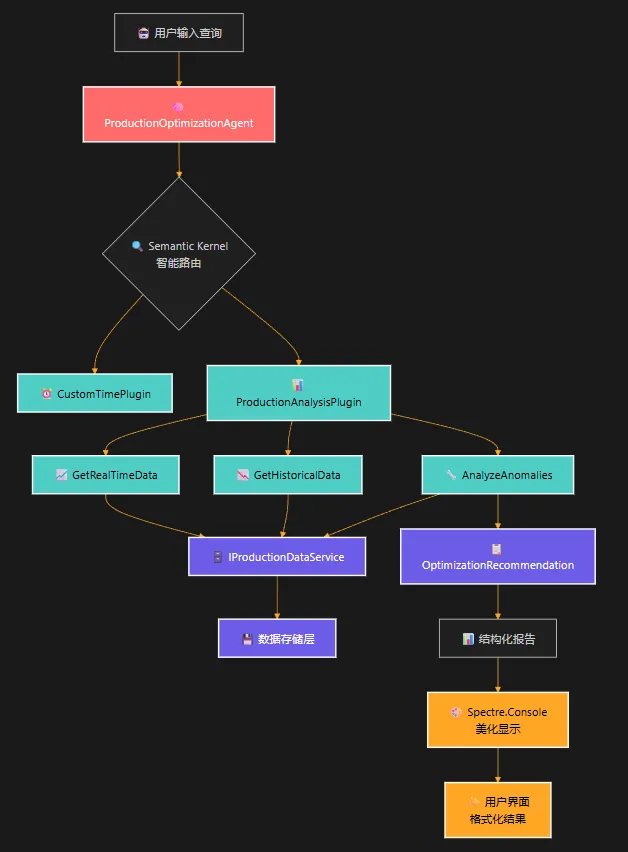
🚀 解决方案:Semantic Kernel + AI Agent架构
Semantic Kernel是微软开源的AI编排框架,它的核心优势在于:
- 🔌 插件化设计:将复杂业务逻辑封装成可复用的插件
- 🤖 自动函数调用:AI可以智能选择合适的工具处理问题
- 🔄 流程编排:将多个AI能力组合成完整的业务流程
💻 核心架构设计
我们的系统采用典型的插件化架构:
在这个信息爆炸的时代,程序员们经常需要从各种网页中提取有价值的内容。传统的爬虫要么暴力抓取全部内容,要么需要针对每个网站手写复杂的解析规则。如果告诉你,现在可以让AI自动分析网页结构,精准定位主要内容区域,你会不会觉得这就是你一直在寻找的解决方案?
本文将带你深入了解如何结合Semantic Kernel、HtmlAgilityPack和AI模型,构建一个智能的网页内容提取和总结工具。这不仅是一次技术实践,更是探索AI在传统爬虫领域的创新应用。
🔍 传统爬虫的三大痛点
痛点一:网页结构千变万化
每个网站的HTML结构都不同,新闻网站、技术博客、电商平台的内容区域完全不一样。传统方案需要为每种网站类型编写专门的提取规则。
痛点二:反爬虫机制越来越复杂
现代网站普遍部署了sophisticated的反爬虫策略:动态加载、验证码、频率限制、User-Agent检测等等。
痛点三:内容质量参差不齐
即使成功抓取到内容,如何从海量信息中提取真正有价值的部分,依然是个技术难题。
💡 AI驱动的智能解决方案
核心思路:三步走策略
第一步:获取网页的HTML框架结构(去除具体内容,保留标签结构)
第二步:让AI分析HTML结构,智能识别主体内容区域
第三步:根据AI推荐的选择器精准提取内容,并进行智能总结
这个方案的精妙之处在于:我们不是让AI处理完整的HTML内容,而是让它分析结构化的框架,这样既提高了准确性,又大大降低了token消耗。